With the help of the Google Tag Manager, certain events and processes can be registered and processed on a website.
Each of these events that are triggered is a so-called tag. Tags are events that are triggered depending on a trigger. These tags can, among other things, pass on information to other Google services such as Google Analytics or Google AdWords.
A trigger can take various forms. It can be the loading of a page, the clicking of a link, the sending of a form and much more. These triggers can be further restricted. For example, a trigger that is triggered when a page is loaded can be changed to only take effect on certain pages.
These restrictions are based on variables. Within the Google Tag Manager, there are already a number of built-in variables such as the current path or the class of the element that was clicked on. However, many of these variables are not initially active and must be activated via the "Configure" button in the variables overview. You can also configure your own variables, but more on this later.
Example: Calling up the contact page on Sundays
On a website, page views of the contact page on Sundays are to be recorded and forwarded to Google Analytics.
First, we create a new variable of the type "Custom JavaScript" to store the current day of the week. Within this variable type, a function can be defined whose return value is assigned to the value of the variable. The following code is therefore sufficient for the current day of the week:
function () {
  var date = new Date();
  var dayOfWeek = date.getDay();
  return dayOfWeek;
}
Important: Other variables can be used within such a snippet. The built-in variable Page Path can be included within the code as follows: "{{Page Path}}".
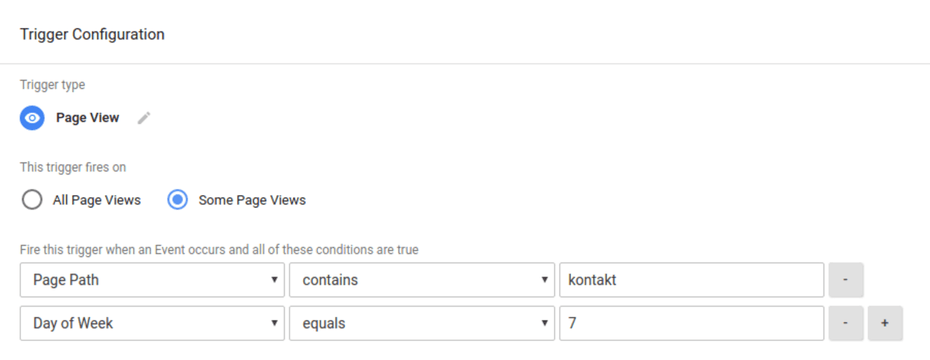
Next, we create a trigger of the type "Page View", which is triggered each time a page is called. This trigger is now restricted depending on two variables: The "PagePath" must contain "contact" to ensure that the called page is a contact page. In addition, the self-defined variable "Day of Week" must be equal to "7". The fully configured trigger then looks like this:
The last thing missing is the configuration of the tag.
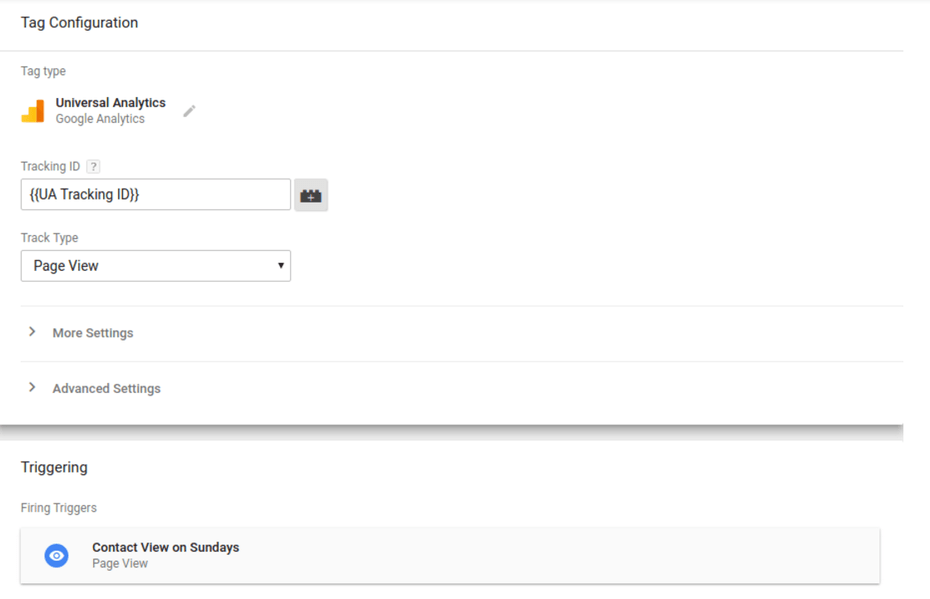
As the information is to be forwarded to Google Analytics, we create a corresponding tag. The tracking ID can either be added manually or via a previously defined variable. As we are dealing with page views, we select "Page View" as the "Track Type". Finally, the previously created trigger is added. If this tag is saved, every visit to the contact page on Sundays will be forwarded to Google Analytics in future.
Example: Using a custom event
The "dataLayer" is a variable within the Google Tag Manager in which information can be stored. A common application is the use of the "dataLayer" in connection with a trigger of the type "Custom Event".
A tag does not always have to pass on information to Google services. It can also simply execute some code via the "Custom HTML" type.
In an (admittedly not very useful) example, a tag of the type "CustomHTML" with the trigger "Page View" can execute the following code:
dataLayer.push({'event': 'page-view'});
This adds the "event" with the value "page-view" to the "dataLayer" on every page view. Not only values of the type "event", but also any information of the schema "key: value" can be saved. If information with the same key as existing information is added, the existing information is overwritten with the new value.
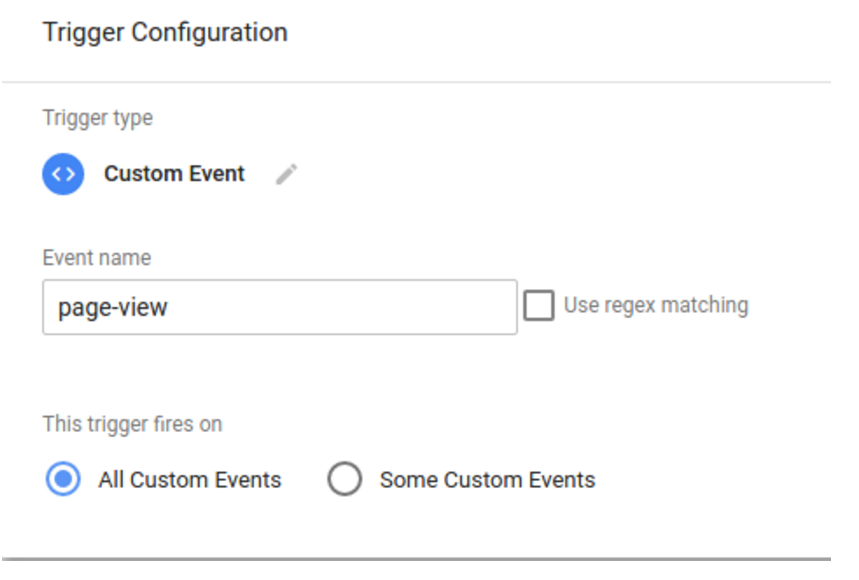
Another tag can now be triggered with a trigger of the type "custom event" as soon as this event is added to the "dataLayer".
It is important here that any information stored in the "dataLayer" is reset when a new page is called up. In order to store information over a longer period of time, several adjustments must be made.
Information on this can be found in the current Google Tag Manager on the arocom website and at the following link: https: //www.simoahava.com/analytics/persist-datalayer-google-tag-manager/.
Using the preview
The preview offers the possibility to test the changes on the live page before they are published.
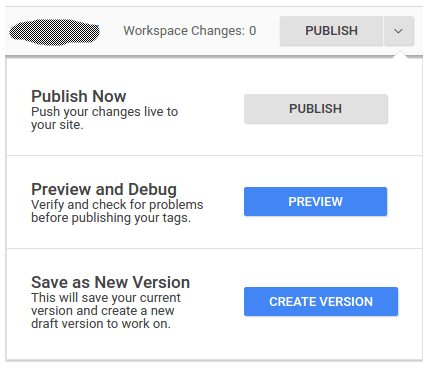
It can be accessed via the drop-down menu next to the Publish button. Once the preview has been activated, the following menu can be used to call up the live page. If the page is called up locally, you must log out as a user.

This menu lists all events that have occurred since the page was loaded on the left. To the right is an overview of the tags and an indication of whether and how often a tag has been triggered.
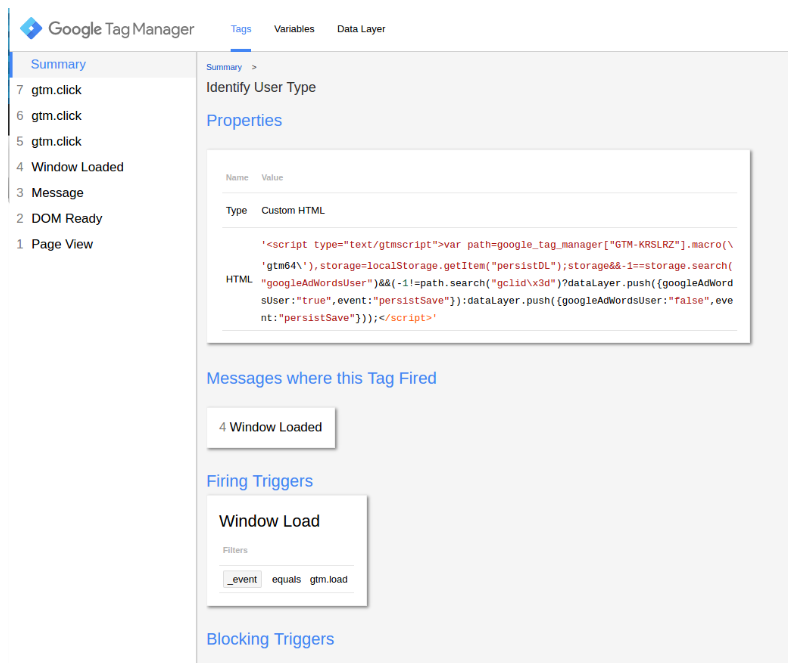
If you click on a triggered tag, you will see an overview of what triggered the tag and what consequences this has. (In this case, only some custom code is executed)
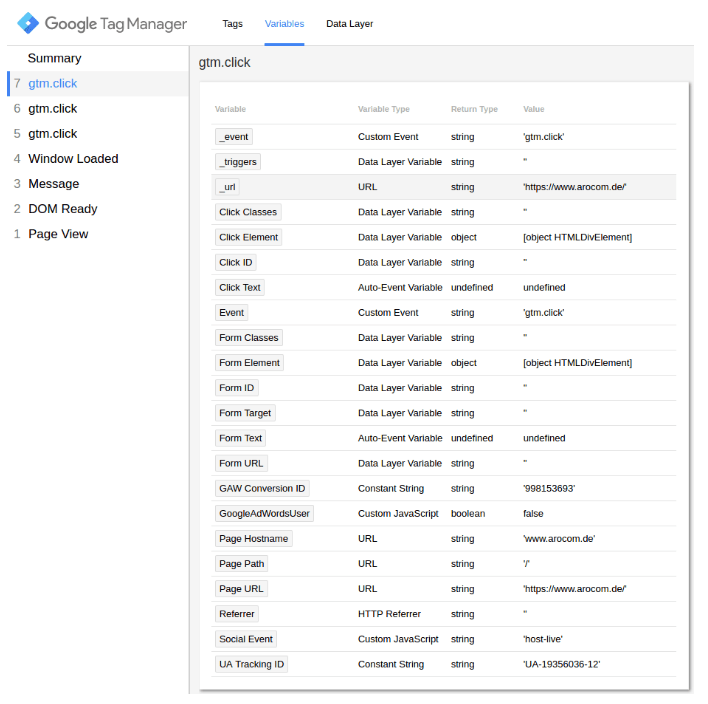
If you select the "Variables" tab and an event in the left-hand column, you will see an overview of all variables (predefined and self-created) for the time period of this event.
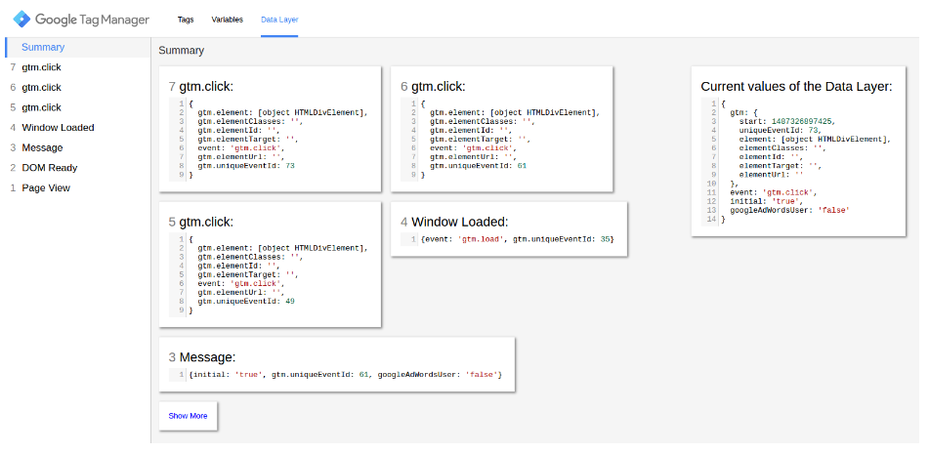
By selecting the "Data Layer" tab, either an overview (by selecting "Summary" in the left-hand column) or a snapshot (by selecting a specific event in the left-hand column) of the values within the "dataLayer" can be called up.
Conclusion
The Google Tag Manager offers an interesting tool for tracking interactions on your website. After a little training, you can measure user activities on your website in a targeted manner and use the knowledge gained to improve your web presence. Incidentally, Google Data Studio offers further interesting functionalities for the visual analysis and presentation of data from Google Analytics and other sources.
We would be happy to explain to you in more detail what possibilities the Google Tag Manager offers for your website. info@arocom.de


